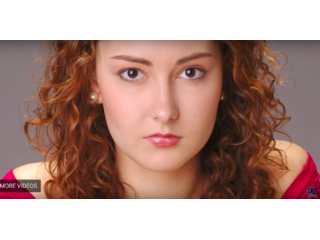
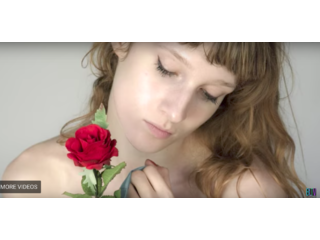
Photoshop Tutorial: How to Make a Beautiful, Watercolor Portrait from a Photo
Figuration: Tutorial
Description
Photo: Jean-Christophe Destailleur
Subscribe to Blue Lightning TV!:
http://goo.gl/HEpuJ4
Website:
http://www.bluelightningtv.com/
Get up to 20% off Photoshop + Lightroom! Only $7.99 p/month:
http://goo.gl/QFznn7
Become a Patron to Blue Lighting TV:
https://www.patreon.com/bluelightningtv
Facebook:
https://goo.gl/fHLJsh
Twitter:
https://twitter.com/bluelightningtv
Metadata
| Video ID | 105 | Youtube URL | Photoshop Tutorial: How to Make a Beautiful, Watercolor Portrait from a Photo |
|---|---|
| Captions Available | Yes |
| Captions Downloadable | Yes |
| Playlists | |
| Duration | 00:05:54 |
| Definition | hd |
| Keywords | |
| License | youtube |
| Embeddable | Yes |
| Views | 235534 |
| Likes | 2574 |
| Dislikes | 21 |
| Favourites | 0 |
| Comments | 177 |
| Created | 2017-05-04 1:00:42 PM |
| Updated | 2017-05-04 1:10:49 PM |
Captions
ASR: en
0:00:07.410,0:00:12.570
hi this is Marty from Blue Lightning TV
0:00:10.370,0:00:14.820
I'm going to show you how to create
0:00:12.570,0:00:17.779
beautiful watercolor portraits from
0:00:14.820,0:00:20.580
photos using your own brush strokes
0:00:17.779,0:00:22.500
because the your own brushstrokes it
0:00:20.580,0:00:26.150
allows you to create your own subtle
0:00:22.500,0:00:28.650
nuances open a photo you'd like to use
0:00:26.150,0:00:30.390
since every photo has its own unique
0:00:28.650,0:00:33.510
characteristics such as lighting
0:00:30.390,0:00:35.430
brightness contrast in color the results
0:00:33.510,0:00:38.580
of the watercolor effect will vary if
0:00:35.430,0:00:41.160
the subject has very light skin it may
0:00:38.580,0:00:43.559
be necessary to darken the mid-tones you
0:00:41.160,0:00:46.739
can achieve this by pressing ctrl L on
0:00:43.559,0:00:49.620
Windows or command L on a Mac to open
0:00:46.739,0:00:51.960
your levels window slide the input
0:00:49.620,0:00:53.879
mid-tones to the right I'd also
0:00:51.960,0:00:56.280
recommend using a photo that doesn't
0:00:53.879,0:00:58.949
have a dark background if it does just
0:00:56.280,0:01:00.930
lighten it its size and resolution will
0:00:58.949,0:01:03.840
ultimately determine the setting amounts
0:01:00.930,0:01:07.830
for the filters and brushes this photo
0:01:03.840,0:01:11.880
is 1550 by 870 pixels with a resolution
0:01:07.830,0:01:13.890
of 150 pixels per inch unlock the
0:01:11.880,0:01:16.709
background by holding down alt on
0:01:13.890,0:01:21.000
Windows or option on a Mac as you click
0:01:16.709,0:01:24.770
on the lock will name it base make a
0:01:21.000,0:01:30.929
copy of it by pressing ctrl or command J
0:01:24.770,0:01:34.229
name it smart ler go to filter blur and
0:01:30.929,0:01:36.989
smart blur for the size and resolution
0:01:34.229,0:01:40.950
of this photo I'll make the radius 10
0:01:36.989,0:01:43.770
the threshold 20 the quality is high and
0:01:40.950,0:01:46.530
the mode is normal depending on the size
0:01:43.770,0:01:47.970
and resolution of your photo you may
0:01:46.530,0:01:50.220
want to adjust the amounts for the
0:01:47.970,0:01:54.929
radius and threshold to get a similar
0:01:50.220,0:01:57.450
result as this click on the thumbnail of
0:01:54.929,0:02:02.340
the base to make it active and make a
0:01:57.450,0:02:06.239
copy of it drag it to the top and name
0:02:02.340,0:02:10.830
it pencil lines go to filter and filter
0:02:06.239,0:02:13.530
gallery open the stylized folder in it
0:02:10.830,0:02:15.990
you'll find glowing edges if you have an
0:02:13.530,0:02:19.650
early version of photoshop go to filter
0:02:15.990,0:02:20.840
stylize and glowing edges make the edge
0:02:19.650,0:02:23.690
with one
0:02:20.840,0:02:28.690
the edge brightness between 14 and 17
0:02:23.690,0:02:31.730
and the smoothness 15 then click OK
0:02:28.690,0:02:35.629
invert the image by pressing ctrl or
0:02:31.730,0:02:39.670
command I then remove the color by
0:02:35.629,0:02:43.700
pressing ctrl or command shift you
0:02:39.670,0:02:46.549
change the blend mode to multiply make
0:02:43.700,0:02:52.280
the smart blur layer active and make a
0:02:46.549,0:02:55.610
copy of it will name it brush invert the
0:02:52.280,0:03:01.250
layer and change its blend mode to color
0:02:55.610,0:03:03.380
Dodge open your brush tool and press D
0:03:01.250,0:03:05.480
on your keyboard to make your foreground
0:03:03.380,0:03:08.329
and background colors black and white
0:03:05.480,0:03:11.989
respectively click the arrow next to the
0:03:08.329,0:03:14.720
brush size and click the gear icon to
0:03:11.989,0:03:19.519
open your list of brush presets click
0:03:14.720,0:03:21.560
reset brushes and click OK to replace
0:03:19.519,0:03:24.819
the current brushes with the default
0:03:21.560,0:03:29.590
brushes click back on the gear icon and
0:03:24.819,0:03:33.889
choose small list scroll down and click
0:03:29.590,0:03:37.220
dry brush reduce its opacity to ten
0:03:33.889,0:03:39.530
percent to increase the size of your
0:03:37.220,0:03:43.340
brush press the right bracket key on
0:03:39.530,0:03:50.690
your keyboard I increased it to 200
0:03:43.340,0:03:54.859
pixels now brush across your image open
0:03:50.690,0:03:59.299
your gear icon again and click wet media
0:03:54.859,0:04:02.030
brushes click OK and choose watercolor
0:03:59.299,0:04:05.599
textured surface press Enter or return
0:04:02.030,0:04:09.829
to close the brush panel and increase
0:04:05.599,0:04:12.980
your brush size I made mine 300 pixels
0:04:09.829,0:04:15.799
now selectively brush over areas of your
0:04:12.980,0:04:21.349
image it's ok to leave lighter areas
0:04:15.799,0:04:24.919
untouched I'll make my brush smaller by
0:04:21.349,0:04:26.720
pressing the left bracket key continue
0:04:24.919,0:04:29.990
to brush over your image to bring out
0:04:26.720,0:04:32.690
contrast and color if you want to
0:04:29.990,0:04:34.430
lighten or remove some pencil lines make
0:04:32.690,0:04:37.160
the pencil line layer active
0:04:34.430,0:04:40.100
and click the layer mask icon to make a
0:04:37.160,0:04:43.100
layer mask next to it increase the
0:04:40.100,0:04:45.140
opacity to eighty percent and lightly
0:04:43.100,0:04:49.550
brush over the pencil lines you'd like
0:04:45.140,0:04:52.010
to lighten or remove next will darken
0:04:49.550,0:04:55.100
the input levels of the brushstrokes but
0:04:52.010,0:04:59.300
leave the pencil lines as is to do this
0:04:55.100,0:05:03.380
hide the pencil lines and make the brush
0:04:59.300,0:05:06.860
layer active press ctrl shift alt e on
0:05:03.380,0:05:09.560
windows or command shift option e on a
0:05:06.860,0:05:13.850
mac to make a composite snapshot of your
0:05:09.560,0:05:16.220
image press ctrl or command l to open
0:05:13.850,0:05:18.830
your levels window and then drag the
0:05:16.220,0:05:20.810
input darks to the right until it's at
0:05:18.830,0:05:27.580
the point where the histogram starts to
0:05:20.810,0:05:32.360
rise make the pencil lines visible and
0:05:27.580,0:05:34.990
go to filter and filter gallery open the
0:05:32.360,0:05:38.630
texture folder and click texturizer
0:05:34.990,0:05:41.420
choose sandstone the scaling is a
0:05:38.630,0:05:44.660
hundred percent the relief is two or
0:05:41.420,0:05:48.050
three and the light is from the top then
0:05:44.660,0:05:52.120
click OK this is Marty from Blue
0:05:48.050,0:05:52.120
Lightning TV thanks for watching
0:05:52.770,0:05:54.830
you
standard: en
0:00:04.330,0:00:08.210
0:00:08.210,0:00:10.830
Hi. This is Marty from Blue Lightning TV.
0:00:10.830,0:00:15.600
I'm going to show you how to create
beautiful, watercolor portraits from photos
0:00:15.600,0:00:15.650
0:00:15.650,0:00:20.609
using your own brush strokes.
Because they're your own brush strokes,
0:00:20.609,0:00:26.470
it allows you to create your own subtle nuances.
Open a photo you'd like to use.
0:00:26.470,0:00:30.689
Since every photo has its own unique characteristics, such as lighting,
0:00:30.689,0:00:35.400
brightness, contrast and color,
the results of the watercolor effect will vary.
0:00:35.400,0:00:35.410
0:00:35.410,0:00:40.740
If the subject has very light skin,
it may be necessary to darken the mid-tones.
0:00:40.740,0:00:44.450
You can achieve this by pressing Ctrl + L on Windows
0:00:44.450,0:00:47.890
or Cmd + L on a Mac to open your Levels window.
0:00:47.890,0:00:51.030
Slide the Input mid-tones to the right.
0:00:51.030,0:00:55.110
I'd also recommend using a photo that
doesn't have a dark background
0:00:55.110,0:01:00.150
If it does, just lighten it. Its size and
resolution will ultimately determine the
0:01:00.150,0:01:02.510
setting amounts for the filters and brushes.
0:01:02.510,0:01:05.519
This photo is 1550
0:01:05.519,0:01:10.470
by 870 pixels with a resolution up to 150 pixels per inch.
0:01:10.470,0:01:14.600
Unlock the background by holding down Alt on Windows
0:01:14.600,0:01:17.630
or Option on a Mac as you click on the lock.
0:01:17.630,0:01:21.840
We'll name it "Base". Make a copy of it
0:01:21.840,0:01:26.039
by pressing Ctrl or Cmd + J. Name it
0:01:26.039,0:01:29.960
"Smart Blur". Go to Filter,
0:01:29.960,0:01:34.630
Blur and Smart Blur. For the size and resolution
0:01:34.630,0:01:39.149
of this photo, I'll make the Radius: 10... the Threshold: 20...
0:01:39.149,0:01:42.399
the Quality is High and the Mode is Normal.
0:01:42.399,0:01:46.069
Depending on the size and resolution of your photo,
0:01:46.069,0:01:49.420
you may want to adjust the amounts for the Radius and Threshold
0:01:49.420,0:01:56.600
to get a similar result as this.
Click on the thumbnail of the Base to make it active
0:01:56.600,0:02:01.509
and make a copy of it. Drag it to the top
0:02:01.509,0:02:05.509
and name it "Pencil Lines". Go to
0:02:05.509,0:02:10.250
Filter and Filter Gallery. Open the "Stylize" folder.
0:02:10.250,0:02:15.090
In it, you'll find "Glowing Edges".
If you have an early version of Photoshop,
0:02:15.090,0:02:18.470
go to Filter, Stylize and Glowing Edges.
0:02:18.470,0:02:24.120
Make the Edge Width: 1... the Edge Brightness between 14 and 17
0:02:24.120,0:02:27.739
and the Smoothness: 15. Then. click OK.
0:02:27.739,0:02:31.680
Invert the image by pressing Ctrl
0:02:31.680,0:02:35.430
or Cmd + I. Then, remove the color
0:02:35.430,0:02:38.560
by pressing Ctrl or Cmd + Shift + U.
0:02:38.560,0:02:42.370
Change the Blend Mode to Multiply.
0:02:42.370,0:02:45.620
Make the Smart Blur layer active
0:02:45.620,0:02:51.100
and make a copy of it. We'll name it "Brush".
0:02:51.100,0:02:55.140
Invert the layer and change its Blend Mode
0:02:55.140,0:03:00.099
to Color Dodge. Open your Brush Tool
0:03:00.099,0:03:04.860
and press "d" on your keyboard to make
your foreground and background colors
0:03:04.860,0:03:09.409
black and white. respectively. Click the arrow next to the brush size
0:03:09.409,0:03:13.959
and click the gear icon to open your list of brush presets.
0:03:13.959,0:03:18.840
Click "Reset Brushes" and click OK
0:03:18.840,0:03:22.290
to replace the current brushes with the default brushes.
0:03:22.290,0:03:26.010
Click back on the gear icon and choose
0:03:26.010,0:03:29.099
"Small List". Scroll down
0:03:29.099,0:03:34.590
and click "Dry Brush". Reduce its opacity to 10%.
0:03:34.590,0:03:37.950
To increase the size of your brush,
0:03:37.950,0:03:44.109
press the right bracket key on your keyboard. I increased to 200 pixels.
0:03:44.109,0:03:52.200
Now, brush across your image. Open your gear icon again
0:03:52.230,0:03:55.640
and click "Wet Media Brushes".
0:03:55.640,0:04:00.689
Click OK and choose "Watercolor Textured Surface".
0:04:00.689,0:04:04.150
Press Enter or Return to close the Brush panel
0:04:04.150,0:04:08.120
and increase your brush size.
0:04:08.120,0:04:12.109
I made mine 300 pixels. Now, selectively brush
0:04:12.109,0:04:19.109
over areas of your image.
It's okay to leave lighter areas untouched.
0:04:19.180,0:04:24.419
I'll make my brush smaller by pressing the Left bracket key.
0:04:24.419,0:04:29.360
Continue to brush over your image to bring out contrast and color.
0:04:29.360,0:04:32.470
If you want to lighten or remove some pencil lines,
0:04:32.470,0:04:36.780
make the Pencil Line layer active and click the Layer Mask icon
0:04:36.780,0:04:42.680
to make a layer mask next to it. Increase the opacity to 80%
0:04:42.680,0:04:48.000
and lightly brush over the pencil lines you'd like to lighten or remove.
0:04:48.000,0:04:54.300
Next, we'll darken the Input levels of the
brushstrokes, but leave the pencil lines as is.
0:04:54.300,0:04:58.600
To do this, hide the Pencil Lines
0:04:58.600,0:05:01.000
and make the Brush layer active.
0:05:01.000,0:05:03.900
Press Ctrl + Shift + Alt + E on Windows
0:05:03.900,0:05:11.090
or Cmd + Shift + Option + E on a Mac
to make a composite snapshot of your image.
0:05:11.090,0:05:15.229
Press Ctrl or Cmd + L to open your Levels window
0:05:15.229,0:05:19.560
and then drag the Input darks to the right
until it's at the point where the
0:05:19.560,0:05:23.200
histogram starts to rise.
0:05:25.270,0:05:29.509
Make the Pencil Lines visible and go to Filter
0:05:29.509,0:05:33.610
and Filter gallery. Open the Texture folder
0:05:33.610,0:05:37.729
and click "Texturizer". Choose "Sandstone".
0:05:37.729,0:05:42.569
The Scaling is 100%... the Relief is 2 or 3
0:05:42.569,0:05:46.940
and the Light is from the Top. Then, click OK.
0:05:46.940,0:05:50.460
This is Marty from Blue Lightning TV.
Thanks for watching!
Profiles
Profile 1
| Purpose | Tutorial (why) |
|---|---|
| Content | |
| Participants | nameless (f) model, Photoshop (m) geek |
| Form | Tutorial (how) |
| Time | |
| Place |
Profile 2
| Purpose | Tutorial |
|---|---|
| Content | Portrait |
| Participants | nameless (f) model, Photoshop (m) geek |
| Form | Tutorial (how) |
| Time | Real time |
| Place | Desktop |
Profile 4
| Purpose | |
|---|---|
| Content | Portrait |
| Participants | |
| Form | |
| Time | |
| Place |

