Photoshop CC Tutorial - Portrait Retouching Photo Effect Editing
Figuration: Tutorial
Description
how to edit portrait effect in photoshop, how to skin retouching easily, adding background, adding some nice color effects, dodge & burn tool, & many more. I hope enjoying this video :).
Stock Credits ►
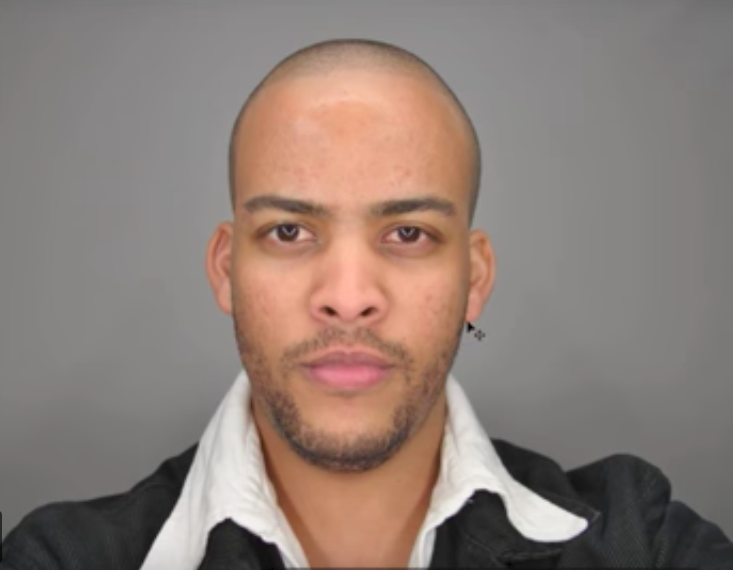
Model: http://minorphicphoto.deviantart.com/art/Portrait-Stock-11-245772370
Nebula Background: http://ineedfire.deviantart.com/art/Nebula-Effects-Fractal-Stock-116324836
Brush: http://www.deviantart.com/art/My-Brush-Pack-118954791
Stay Connected:
Facebook ► https://www.facebook.com/rafyA88
Google+ ► http://bit.ly/rafyA_
Intagram ► https://www.instagram.com/rafya88
Watch More Tutorials ► http://www.rafy-a.com
Thanks for watching.
_
Music :
Elektronomia - Energy [NCS Release]
https://youtu.be/fzNMd3Tu1Zw
Elektronomia
• https://soundcloud.com/elektronomia
• https://www.youtube.com/c/elektronomia
Metadata
| Video ID | 351 | Youtube URL | Photoshop CC Tutorial - Portrait Retouching Photo Effect Editing |
|---|---|
| Captions Available | Yes |
| Captions Downloadable | Yes |
| Playlists | |
| Duration | 00:10:48 |
| Definition | hd |
| Keywords | |
| License | youtube |
| Embeddable | Yes |
| Views | 31535 |
| Likes | 711 |
| Dislikes | 11 |
| Favourites | 0 |
| Comments | 55 |
| Created | 2017-05-04 1:00:45 PM |
| Updated | 2017-05-04 1:14:27 PM |
Captions
standard: en
1
00:00:15,733 --> 00:00:18,066
Hi Guys. welcome back to me :D
2
00:00:18,066 --> 00:00:20,532
I hope you all always have a nice day :)
3
00:00:20,533 --> 00:00:23,199
Let's get started !!
4
00:00:23,200 --> 00:00:27,200
First, duplicate the Layer
5
00:00:27,766 --> 00:00:31,766
let me rename it as Model
6
00:00:35,600 --> 00:00:39,600
go to Camera Raw filter to do following adjustments
7
00:01:06,833 --> 00:01:10,833
click OK when you done !
8
00:01:21,100 --> 00:01:25,100
using the Spot Healing bruh tool (J) to remove the Acne on the face
9
00:01:28,300 --> 00:01:32,300
get rid of acne that looks very rough
10
00:01:51,066 --> 00:01:55,066
Next, duplicate the Model (or you can press Ctrl+J)
11
00:01:58,100 --> 00:02:05,100
Using the Lasso Tool (L) with 25-30 px feather
12
00:02:08,400 --> 00:02:12,400
select the Skin part on the model
13
00:02:17,600 --> 00:02:21,600
go to Gaussian Blur filter
14
00:02:25,500 --> 00:02:30,100
I would be set the Radius about 19.4 px
15
00:02:34,800 --> 00:02:37,533
click OK when you done !!
16
00:02:38,666 --> 00:02:41,766
press Ctrl+D to Deselect
17
00:02:44,600 --> 00:02:48,600
then select another skin parts
18
00:02:49,833 --> 00:02:56,266
you'll see the Filter recently used on the Filter tab. Click it (or you can press Ctrl+F)
19
00:02:59,366 --> 00:03:03,366
doing the same technique to other parts of the skin
20
00:03:20,666 --> 00:03:24,666
Drag the Model above the Model Copy
21
00:03:25,966 --> 00:03:29,966
setting the Blend mode to Linear Light
22
00:03:29,966 --> 00:03:33,966
then go to High Pass filter, we'll bring back the Skin Texture
23
00:03:44,033 --> 00:03:48,033
using the Gaussian Blur filter if you think it's so rough
24
00:04:04,900 --> 00:04:08,300
And it looks good isn't it? :)
25
00:04:09,900 --> 00:04:13,900
press Ctrl+Shift+Alt+E to Merge visible
26
00:04:16,166 --> 00:04:20,166
now it's time to remove the Background
27
00:04:23,200 --> 00:04:27,200
you can use your favorite selection tool
28
00:04:35,000 --> 00:04:39,000
add a Layer Mask
29
00:04:40,133 --> 00:04:44,133
adjust the Edge setting, we will refine the edge pieces on the model
30
00:05:00,366 --> 00:05:04,366
create a new Solid Color (50% grey) under the Model
31
00:05:08,533 --> 00:05:13,633
Drag the Background & drop it onto our project by using the Move tool (V)
32
00:05:14,966 --> 00:05:18,966
press Ctrl+T to Resize it
33
00:05:24,500 --> 00:05:28,500
bring down the Opacity
34
00:05:33,266 --> 00:05:37,266
Create a new Layer
35
00:05:37,266 --> 00:05:41,266
using the Brush tool (get it from link in the description)
36
00:05:42,533 --> 00:05:46,533
start to paint with the Brush :)
37
00:06:40,100 --> 00:06:48,766
Next, create a new Layer & Fill it (Shift+F5) with 50% grey
38
00:06:51,900 --> 00:06:55,900
clip to the Model layer
39
00:06:55,900 --> 00:06:59,900
using The Overlay blend mode.
40
00:07:00,366 --> 00:07:07,799
use the Burn tool (O) for the shadows & Dodge tool for the Highlights
41
00:08:23,100 --> 00:08:27,100
Create a new Layer
42
00:08:29,433 --> 00:08:36,966
use the Linear Gradient tool (G) using the following color
43
00:08:46,100 --> 00:08:50,100
#d33f3e
44
00:08:55,833 --> 00:08:59,833
hold Shift on the Keyboard & do like so ..
45
00:09:05,766 --> 00:09:09,766
next, adding another color
46
00:09:10,233 --> 00:09:14,233
#3e87d3
47
00:09:24,433 --> 00:09:28,433
use the Overlay blend mode.
48
00:09:52,400 --> 00:09:57,733
Create a new adjustment layer - Curves, to adjust the Color
49
00:10:37,600 --> 00:10:40,566
thanks for watching & liking :)
50
00:10:41,733 --> 00:10:45,733
Watch the next ^_^
Profiles
Profile 1
| Purpose | Tutorial (why) |
|---|---|
| Content | |
| Participants | |
| Form | Tutorial (how) |
| Time | |
| Place |
Profile 2
| Purpose | Tutorial |
|---|---|
| Content | Portrait |
| Participants | nameless (m) model |
| Form | Tutorial (how) |
| Time | Real time |
| Place | Desktop |
Profile 4
| Purpose | |
|---|---|
| Content | Portrait |
| Participants | nameless (f) model, nameless (m) model, Photoshop geek |
| Form | |
| Time | |
| Place |