Photoshop Tutorial : Fantasy Dreamy Photo Effects Editing
Figuration: Tutorial
Description
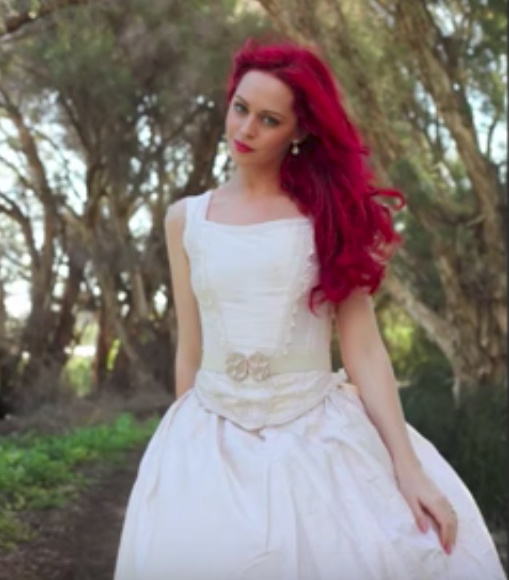
in this photoshop tutorial you'll see how to edit photo into fantasy dreamy photo effects in photoshop cc 2015. change the background, skin smooth retouching, adding nice color effects and many more.
thanks for watching & liking :) .
Stock Images ►
model: http://faestock.deviantart.com/art/Rosa13-270489821
Background Forest : http://austriaangloalliance.deviantart.com/art/Rainy-Forest-Background-303915988
Star Brush: http://demosthenesvoice.deviantart.com/art/Star-Brushes-97311837
Stay Connected:
Facebook ► https://www.facebook.com/rafyA88
Google+ ► http://bit.ly/rafyA_
Intagram ► https://www.instagram.com/rafya88
Watch More Tutorials ► http://www.rafy-a.com
Thanks for watching.
_
Music by :
1. Happiness
2. thelounge
by : bensound.com
Metadata
| Video ID | 353 | Youtube URL | Photoshop Tutorial : Fantasy Dreamy Photo Effects Editing |
|---|---|
| Captions Available | Yes |
| Captions Downloadable | Yes |
| Playlists | |
| Duration | 00:13:55 |
| Definition | hd |
| Keywords | |
| License | youtube |
| Embeddable | Yes |
| Views | 118676 |
| Likes | 1155 |
| Dislikes | 22 |
| Favourites | 0 |
| Comments | 69 |
| Created | 2017-05-04 1:00:45 PM |
| Updated | 2017-05-04 1:14:28 PM |
Captions
standard: en
1
00:00:14,766 --> 00:00:17,599
Let's get started !!
2
00:00:18,666 --> 00:00:28,066
First, cut out the Model from the background using the Quick Selection Tool (W)
3
00:00:36,433 --> 00:00:40,433
you can use your favorite Selection tool
4
00:01:27,633 --> 00:01:30,666
Ctrl+0 to zoom out
5
00:01:30,666 --> 00:01:33,799
adding a Mask to the layer
6
00:01:33,800 --> 00:01:37,800
Right click on the Mask & hit the Refine Mask
7
00:01:38,400 --> 00:01:44,233
adjust the Edge setting, we will refine the edge pieces on the model
8
00:02:18,000 --> 00:02:23,666
select the Move tool (V), drag & drop it onto our Background
9
00:02:23,666 --> 00:02:27,666
Ctrl+T to resize it
10
00:02:36,800 --> 00:02:43,266
select the Background then go to Field Blur filter.
11
00:02:57,700 --> 00:03:00,266
press OK when you done!!
12
00:03:06,966 --> 00:03:11,199
select the Model, right click & convert it to Smart Object
13
00:03:11,200 --> 00:03:15,200
use Camera Raw filter to adjust the Model
14
00:03:17,633 --> 00:03:21,633
I'll increase the Exposure a bit
15
00:03:32,866 --> 00:03:36,866
press OK when you done!!
16
00:03:42,733 --> 00:03:46,733
create a new Layer & create clipping mask
17
00:03:46,733 --> 00:03:51,833
use the Linear Gradient tool (G) with Black and do like so..
18
00:03:54,000 --> 00:03:58,000
use Soft Light blend mode
19
00:04:02,433 --> 00:04:09,599
select the Background & create a new adjustment layer - Color Balance.
20
00:04:15,433 --> 00:04:18,199
create a new layer
21
00:04:18,200 --> 00:04:22,200
use the Brush tool (B) & do like so..
22
00:04:34,433 --> 00:04:38,433
Ctrl+T to resize it
23
00:04:41,300 --> 00:04:45,300
use Hard Light blend mode
24
00:04:48,933 --> 00:04:52,933
Ctrl+T to resize it
25
00:05:08,766 --> 00:05:14,366
next, select the Model then go to Surface Blur
26
00:05:31,500 --> 00:05:34,600
select the Smart Filters mask
27
00:05:34,600 --> 00:05:38,600
press Ctrl+i to invert
28
00:05:40,233 --> 00:05:46,399
use the Brush tool (B) with White & paint it on the Skin
29
00:06:45,700 --> 00:06:49,700
next, create a new layer & clip to the layer below
30
00:06:50,733 --> 00:06:54,733
go to Fill (shift+f5) & select 50% grey
31
00:06:55,100 --> 00:06:59,100
use Overlay blend mode
32
00:07:01,400 --> 00:07:09,433
use the Dodge tool (O) to add Highlight on the Model.
33
00:07:28,333 --> 00:07:32,333
press Ctrl+Z to undo
34
00:07:53,100 --> 00:07:57,100
create a new fill Solid Color (black)
35
00:08:00,000 --> 00:08:02,966
bring down the Opacity ..
36
00:08:04,966 --> 00:08:09,599
use the Radial Gradient tool (G) & do like so..
37
00:08:27,866 --> 00:08:31,332
create a new layer
38
00:08:31,333 --> 00:08:35,133
select the Brush tool (B) with White.
39
00:08:35,133 --> 00:08:42,699
select the Star Brush you can download it from link in the description
40
00:08:49,066 --> 00:08:53,066
go to Brush Presets & do the following settings
41
00:09:13,266 --> 00:09:17,266
and start to add the Stars :D
42
00:09:53,866 --> 00:09:57,866
use the Erase tool (E) to remove unnecessary stars
43
00:10:32,700 --> 00:10:35,366
next create a new layer
44
00:10:35,733 --> 00:10:39,733
select the Brush tool (B) & use the following color
45
00:10:47,800 --> 00:10:50,966
choose the Soft Brush..
46
00:10:52,233 --> 00:10:56,233
Ctrl+T to resize it
47
00:10:56,866 --> 00:11:00,866
use the Screen blend mode
48
00:11:13,566 --> 00:11:17,566
then create another one..
49
00:11:30,400 --> 00:11:32,966
select the Model & double click
50
00:11:32,966 --> 00:11:36,966
go to Inner Shadow & do the following settings
51
00:11:36,966 --> 00:11:40,966
set the direction to the Source Light
52
00:11:59,933 --> 00:12:03,933
create a new adjustment layer - Gradient Map.
53
00:12:12,400 --> 00:12:16,400
use Soft Light blend mode
54
00:12:18,933 --> 00:12:22,933
create a new adjustment layer - Curves.
55
00:12:27,300 --> 00:12:31,300
adjust the Blue & Red ..
56
00:12:59,400 --> 00:13:02,400
Ctrl+Shift+Alt+E to merge visible
57
00:13:02,400 --> 00:13:05,466
use Soft Light Blend mode
58
00:13:05,466 --> 00:13:09,466
then go to Gaussian Blur filter
59
00:13:11,000 --> 00:13:16,233
create a new adjustment layer - Levels. clip to layer below
60
00:13:39,366 --> 00:13:40,399
and we done :)
61
00:13:47,900 --> 00:13:53,633
watch next :)
Profiles
Profile 1
| Purpose | Tutorial (why) |
|---|---|
| Content | |
| Participants | nameless (f) model, Photoshop geek |
| Form | Tutorial (how) |
| Time | |
| Place |
Profile 2
| Purpose | Tutorial |
|---|---|
| Content | Portrait |
| Participants | nameless (f) model |
| Form | Tutorial (how) |
| Time | Real time |
| Place | Desktop |
Profile 4
| Purpose | |
|---|---|
| Content | Portrait |
| Participants | |
| Form | |
| Time | |
| Place |