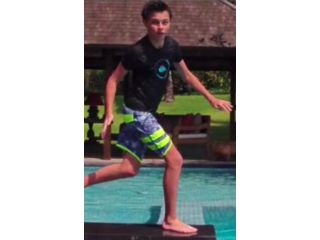
How to Quickly Make an Action Sequence in Photoshop!
Figuration: Tutorial
Description
Step by Step Instructions:
1. After opening Photoshop, select File, Automate, Photomerge.
2. Select your photos and untick 'Blend Images together'
3. Wait for Photoshop to load the images.
4. Select your topmost layer.
5. Select Layer, Layer Mask, Hide All
6. Select the Brush tool and set the brush opacity to 100%.
7. Change the colour to white.
8. Select the layer mask on the layer.
9. Begin painting in the location of the object of the layer.
10. Select the next layer and repeat steps 5 to 9.
Be sure to subscribe for more Quick Tech Tips!
Metadata
| Video ID | 429 | Youtube URL | How to Quickly Make an Action Sequence in Photoshop! |
|---|---|
| Captions Available | No |
| Captions Downloadable | Yes |
| Playlists | |
| Duration | 00:04:03 |
| Definition | hd |
| Keywords | |
| License | youtube |
| Embeddable | Yes |
| Views | 2174 |
| Likes | 45 |
| Dislikes | 0 |
| Favourites | 0 |
| Comments | 14 |
| Created | 2017-05-04 1:00:46 PM |
| Updated | 2017-05-04 1:14:52 PM |
Captions
ASR: en
0:00:00.000,0:00:03.240
hey guys welcome back to Ben's tech tips
0:00:01.620,0:00:07.190
and today I'm gonna be showing you how
0:00:03.240,0:00:07.190
to make an action sequence in Photoshop
0:00:14.059,0:00:22.859
to begin with click on file automate
0:00:18.240,0:00:25.830
photo merge from here make sure auto is
0:00:22.859,0:00:29.939
selected untok blend images together and
0:00:25.830,0:00:31.439
then click browse now select your images
0:00:29.939,0:00:37.559
that you want to put into the action
0:00:31.439,0:00:41.190
sequence once they're loaded in there
0:00:37.559,0:00:44.670
click OK as you can see I took these
0:00:41.190,0:00:46.410
photos on my go pro so I must have moved
0:00:44.670,0:00:49.110
it when I was taking the photo so now
0:00:46.410,0:00:51.270
Photoshop will spend a bit of time to
0:00:49.110,0:00:53.760
align the photos and when it's finished
0:00:51.270,0:00:55.590
you'll see a little bit of white around
0:00:53.760,0:00:59.360
the corner because it's transformed them
0:00:55.590,0:00:59.360
all to look roughly the same
0:01:02.630,0:01:07.670
once it loads up you want to make sure
0:01:05.330,0:01:13.400
your first layer is selected then click
0:01:07.670,0:01:15.860
layer layer mask hide all from here
0:01:13.400,0:01:18.520
select the brush tool make sure you've
0:01:15.860,0:01:21.290
got a big brush around 150 pixels or
0:01:18.520,0:01:23.900
depending on how high resolution your
0:01:21.290,0:01:28.970
photo is and ensure the opacity is a
0:01:23.900,0:01:30.860
hundred percent now select white now you
0:01:28.970,0:01:33.050
can paint in your other people or
0:01:30.860,0:01:36.410
objects or whatever you're making the
0:01:33.050,0:01:37.760
action sequence on there are a few
0:01:36.410,0:01:40.240
things you want to look out for such as
0:01:37.760,0:01:40.240
shadows
0:01:46.860,0:01:53.750
and try and keep the low mask
0:01:49.730,0:01:56.120
just just as because it needs to be and
0:01:53.750,0:01:58.160
don't go overboard because sometimes you
0:01:56.120,0:02:00.530
can get discrepancies with roofs lines
0:01:58.160,0:02:02.330
and other lines in the background now
0:02:00.530,0:02:06.320
going to your next layer and repeat the
0:02:02.330,0:02:11.720
process layer layer mask hi doll then
0:02:06.320,0:02:14.780
just paint in your guy simple as that so
0:02:11.720,0:02:17.600
when you're painting in our things in
0:02:14.780,0:02:19.520
the action sequence you can create the
0:02:17.600,0:02:21.500
mask to go backwards and that doesn't
0:02:19.520,0:02:24.140
matter but if you go forwards it'll
0:02:21.500,0:02:28.340
start erasing so make sure you don't go
0:02:24.140,0:02:31.490
forwards and in Photoshop step backward
0:02:28.340,0:02:33.890
is command option C so make sure you get
0:02:31.490,0:02:35.540
these it's so you'll want to zoom in and
0:02:33.890,0:02:36.740
maybe you can change brush closes but
0:02:35.540,0:02:40.580
I'm just going to do this quickly with a
0:02:36.740,0:02:43.430
big brush so I can show you da da da da
0:02:40.580,0:02:46.570
da there we go now you go on to the next
0:02:43.430,0:02:46.570
one repeat the process
0:02:53.400,0:02:55.459
you
0:02:59.300,0:03:03.890
if you accidentally do go over the next
0:03:02.210,0:03:07.400
one simply change your brush to black
0:03:03.890,0:03:10.250
and then we draw over it as you and that
0:03:07.400,0:03:11.990
will fix up the layer mask like this you
0:03:10.250,0:03:16.660
can get to your layer mask by clicking
0:03:11.990,0:03:16.660
holding down option and clicking on it
0:03:17.530,0:03:22.880
now when you get to the end there might
0:03:19.760,0:03:25.880
be a few scenes as in this one I've got
0:03:22.880,0:03:29.840
a few scenes of a splash a bigger splash
0:03:25.880,0:03:33.680
or I can just use another photo of my
0:03:29.840,0:03:36.040
friend here so zoom out and because of
0:03:33.680,0:03:43.730
these dodgy edges you want to crop it
0:03:36.040,0:03:48.730
hang on just get any fingers and stuff
0:03:43.730,0:03:50.960
out of the way make it look nice and
0:03:48.730,0:03:54.670
there you have it that's how you make an
0:03:50.960,0:03:54.670
action sequence in Photoshop
Screenshots
Profiles
Profile 1
| Purpose | |
|---|---|
| Content | Portrait, Scene |
| Participants | nameless (m) model, Photoshop (m) geek |
| Form | |
| Time | |
| Place |
Profile 2
| Purpose | Tutorial |
|---|---|
| Content | |
| Participants | |
| Form | Tutorial (how), Close up |
| Time | |
| Place |


