How to Cut Out Hair in Photoshop
Figuration: Tutorial
Description
OUR #1 PRO TUTORIAL EVER IS NOW ON SALE! https://phlearn.com/product/photoshop-101-301
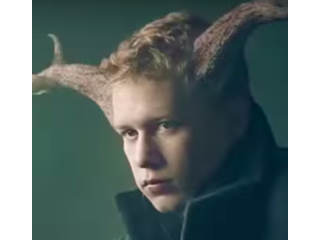
When cutting out hair from a background, it is helpful to keep in mind that it’s much easier to use dark hair against a light background or light hair against a dark background.
Selections
To start, find the color channel which shows the maximum amount of contrast in the hair.
Duplicate that channel and bring up the levels panel (CMD/CNTL + L). We can bring the black point up to create very intense contrast in the image. The darks should be extremely dark but be sure not to overdo it! A good way to check is if the edges of the hair look too coarse, you can decrease the darkness a little bit.
All of this is done in the channels tab, but it needs to be turned into an actual usable selection. Hold CMD/CNTL and click on your channel copy. This selection will remain, and you are able to go back into the layers and edit from there. Click on the layer mask icon, and everything that was dark will turn invisible. All you have to do is invert the selection (CMD/CNTL + I). If parts of the image are transparent that shouldn’t be, you can paint over the layer mask where it needs to be filled in.
To take care of fringing (light or white part around the edges of the hair), clipping masks will come in handy!
-Create a new layer
-Right click, and select “create clipping mask”
-Use the brush tool or clone stamp tool to fill in the white areas
Now, whatever work is done on that layer will only apply to the underlying layer. In other words, your new layer is clipped to what’s under it.
Change the clipped layer from normal to darken- this will only effect the whitest part of the hair. Use the clone stamp tool to paint over the light parts of the hair.
VISIT PHLEARN.COM FOR MORE FREE TUTORIALS
https://phlearn.com
SUBSCRIBE NOW FOR MORE FREE TIPS AND TRICKS
https://www.youtube.com/subscription_center?add_user=phlearnllc
GET FREE TUTORIALS SENT TO YOUR EMAIL + DISCOUNTS ON OUR PRO TUTORIALS!
https://phlearn.com/mail
Use the same Tablet as Aaron: http://amzn.to/1Eykaoh
LET'S BE FRIENDS!
Instagram ► https://www.instagram.com/phlearn/
Facebook ► https://facebook.com/phlearn
Twitter ► https://twitter.com/phlearn
Google+ ► https://plus.google.com/116791098059215639405
Phlearn ► https://phlearn.com
Metadata
| Video ID | 603 | Youtube URL | How to Cut Out Hair in Photoshop |
|---|---|
| Captions Available | No |
| Captions Downloadable | No |
| Playlists | |
| Duration | 00:12:52 |
| Definition | hd |
| Keywords | |
| License | youtube |
| Embeddable | Yes |
| Views | 1084438 |
| Likes | 12299 |
| Dislikes | 232 |
| Favourites | 0 |
| Comments | 958 |
| Created | 2017-05-04 1:00:48 PM |
| Updated | 2017-05-04 1:15:42 PM |
Captions
Captions for this video exist, but their contents were not available to download.
Screenshots
Filter:
Profiles
Profile 1
| Purpose | Tutorial |
|---|---|
| Content | Portrait |
| Participants | nameless (f) model, nameless (m) model, Photoshop (m) geek |
| Form | Tutorial (how), Mid shot, screen grab, split-screen |
| Time | |
| Place |
