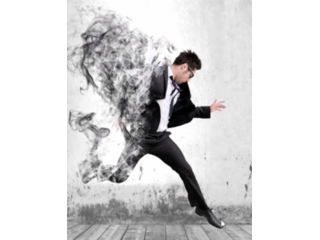
Photoshop Tutorial | Dispersion smoke effects
Figuration: Tutorial
Description
We create masks, and we will learn a bit about them and we will create the smoke dispersion effect step by step!
FOR MORE Tutorials: https://goo.gl/7TtxbU
====================================
Click here to download the photo:
http://br.freepik.com/fotos-gratis/entusiasta-de-negocios-de-salto_899403.htm
====================================
Click here to download the brushes:
https://www.brusheezy.com/brushes/1830-real-smoke-photoshop-brushes
====================================
Photoshop downloads , brushes, etc. Enter here:
http://www.touchtutorials.com/
http://www.photoshopsearch.com/
Metadata
| Video ID | 628 | Youtube URL | Photoshop Tutorial | Dispersion smoke effects |
|---|---|
| Captions Available | No |
| Captions Downloadable | Yes |
| Playlists | |
| Duration | 00:09:11 |
| Definition | hd |
| Keywords | |
| License | youtube |
| Embeddable | Yes |
| Views | 5060 |
| Likes | 55 |
| Dislikes | 0 |
| Favourites | 0 |
| Comments | 10 |
| Created | 2017-05-04 1:00:49 PM |
| Updated | 2017-05-04 1:15:52 PM |
Captions
ASR: en
0:00:08.480,0:00:15.059
hey guys and welcome to photoshop for
0:00:11.759,0:00:18.869
you and this tutorial we gonna make the
0:00:15.059,0:00:21.720
dispersion smoke effect if you remember
0:00:18.869,0:00:25.439
a few years ago I just did dispersion
0:00:21.720,0:00:28.320
effect with the ink brush this time I'm
0:00:25.439,0:00:31.099
gonna do it with this image and we're
0:00:28.320,0:00:34.380
gonna make it as you can see here a
0:00:31.099,0:00:39.270
dispersion smoke effect like is smoked
0:00:34.380,0:00:43.079
out okay over here as you can see okay
0:00:39.270,0:00:45.690
let's get started we have the source
0:00:43.079,0:00:48.059
image this one is the souls image and
0:00:45.690,0:00:51.000
guys you have it in the description
0:00:48.059,0:00:53.280
below I give you a link to this image
0:00:51.000,0:00:56.730
you can practice with me you can open
0:00:53.280,0:01:00.090
the files and see the video and do what
0:00:56.730,0:01:03.239
I'm doing step by step and you going to
0:01:00.090,0:01:05.970
nail it okay so we want to make a
0:01:03.239,0:01:10.740
selection so there's a lot of ways to
0:01:05.970,0:01:13.380
make a selection or mask in Photoshop ok
0:01:10.740,0:01:15.240
so I'm going to make my selection we're
0:01:13.380,0:01:17.759
gonna use this time we're going to use
0:01:15.240,0:01:19.830
the quick selection tool because the
0:01:17.759,0:01:22.890
selection is going to be very easy
0:01:19.830,0:01:25.380
because there's a white background as
0:01:22.890,0:01:29.070
you can see here it's a white background
0:01:25.380,0:01:31.680
and it's very easy to mask it and to
0:01:29.070,0:01:34.380
select whatever you want or whatever you
0:01:31.680,0:01:37.170
need okay so you're going to make a
0:01:34.380,0:01:41.130
rough selection after I select this
0:01:37.170,0:01:43.829
character I want to mask it so now if
0:01:41.130,0:01:48.119
I'm going to click here the icon below
0:01:43.829,0:01:51.720
mask he will disappear why because I
0:01:48.119,0:01:55.979
didn't select him actually I did I
0:01:51.720,0:01:58.649
select the background around him so to
0:01:55.979,0:02:01.860
do that to select this character I must
0:01:58.649,0:02:04.320
go to select inverse and then my
0:02:01.860,0:02:07.610
selection is dis character so now when
0:02:04.320,0:02:12.440
i'm clicking mask it will mask
0:02:07.610,0:02:15.350
the white background okay perfect and I
0:02:12.440,0:02:18.530
want to show my selected I just did
0:02:15.350,0:02:22.010
earlier a better mask because I don't
0:02:18.530,0:02:26.300
have the time to mask it in this video
0:02:22.010,0:02:30.740
so what I want to do is duplicate this
0:02:26.300,0:02:35.420
layer by clicking on the keyboard ctrl +
0:02:30.740,0:02:38.209
J okay we just did it so now first one
0:02:35.420,0:02:40.790
is going to I gonna leave it white and
0:02:38.209,0:02:47.120
the second one is going to be black so i
0:02:40.790,0:02:51.140
will click it ctrl delete and it will be
0:02:47.120,0:02:53.690
black what it means that this one is we
0:02:51.140,0:02:56.930
don't see this layer as you can see when
0:02:53.690,0:02:59.930
I'm hiding the first one you don't see
0:02:56.930,0:03:05.260
the underneath it why because this is
0:02:59.930,0:03:10.520
the black mask it means it's not shown
0:03:05.260,0:03:13.580
okay now in this mask only we click it
0:03:10.520,0:03:17.769
and we choose our brushes okay let's
0:03:13.580,0:03:21.790
click over here in the toolbar brush
0:03:17.769,0:03:25.250
perfect now let's select our brush I
0:03:21.790,0:03:30.040
want to make it large as you can see
0:03:25.250,0:03:30.040
here and I'm going to make my selection
0:03:30.180,0:03:39.599
this one let's say this one okay now
0:03:34.290,0:03:44.189
we're gonna decrease the size okay this
0:03:39.599,0:03:47.909
one is good the angle is good now make
0:03:44.189,0:03:51.480
sure in black mode okay this is black
0:03:47.909,0:03:56.280
mode white as you can see here white
0:03:51.480,0:04:02.090
doesn't delete nothing Black is deleting
0:03:56.280,0:04:09.239
like this perfect do it again over here
0:04:02.090,0:04:16.019
Thanks let's change our brush to this
0:04:09.239,0:04:20.209
one decrease the pixels just like this
0:04:16.019,0:04:24.210
one yeah this one is cool do it again
0:04:20.209,0:04:28.080
choose a different brush decrease the
0:04:24.210,0:04:33.870
size and if you stroke here few strokes
0:04:28.080,0:04:38.479
there until we are done okay now I want
0:04:33.870,0:04:38.479
a bigger one and a different one
0:04:38.770,0:04:46.670
the same process again and again until
0:04:42.440,0:04:49.970
you get the good results that you're
0:04:46.670,0:04:53.210
looking for okay now we are done with
0:04:49.970,0:04:57.740
the white mask now we're going to use
0:04:53.210,0:05:01.400
the black mask but before we do it we
0:04:57.740,0:05:04.910
gonna select only the image over here
0:05:01.400,0:05:10.750
and the layers image and we're going to
0:05:04.910,0:05:14.630
go to filters liquify just like that and
0:05:10.750,0:05:18.590
we're going to use the first tool okay
0:05:14.630,0:05:22.790
the forward work to this one now we're
0:05:18.590,0:05:27.440
gonna increase the size okay and we're
0:05:22.790,0:05:30.830
gonna smush it just like this over here
0:05:27.440,0:05:38.440
until we see
0:05:30.830,0:05:38.440
this image like this okay
0:05:39.330,0:05:42.289
perfect
0:05:43.400,0:05:49.280
let's click okay and we're done now
0:05:47.210,0:05:51.620
we're going to choose our brush and
0:05:49.280,0:05:54.800
we're going to switch to white with
0:05:51.620,0:05:59.060
because we're gonna we want to see what
0:05:54.800,0:06:03.490
we are going to brush okay so let's do
0:05:59.060,0:06:09.800
this choose our brush and start showing
0:06:03.490,0:06:14.960
over here and okay now we're gonna gonna
0:06:09.800,0:06:19.280
click this layer ctrl T and we're going
0:06:14.960,0:06:27.500
to enlarge the image just like this okay
0:06:19.280,0:06:30.560
over here and a bit ear click enter ok
0:06:27.500,0:06:36.410
now we're going to use our brush let's
0:06:30.560,0:06:38.630
see what we have here okay it's not this
0:06:36.410,0:06:41.930
one is not a good brush to choose a
0:06:38.630,0:06:44.380
different brush let's see what this one
0:06:41.930,0:06:44.380
does
0:06:45.610,0:06:56.930
just like that boom different one maybe
0:06:51.230,0:06:59.690
a different angle okay boom there you
0:06:56.930,0:07:03.080
have it it's very important to switch
0:06:59.690,0:07:06.140
between brushes guys because you don't
0:07:03.080,0:07:08.720
want to see a pattern because it's not
0:07:06.140,0:07:11.510
professional so we must switch the
0:07:08.720,0:07:15.200
angles and the brushes all the time now
0:07:11.510,0:07:21.490
wanna smoke for the leg increase the
0:07:15.200,0:07:28.700
size of it okay this one is good and
0:07:21.490,0:07:33.800
boom yeah now let's crop the image a
0:07:28.700,0:07:37.520
little bit bigger okay this one is good
0:07:33.800,0:07:42.920
now i want to delete this line what I do
0:07:37.520,0:07:46.730
is I select my brush and instead of
0:07:42.920,0:07:50.880
black I'm doing it white so I can delete
0:07:46.730,0:07:54.220
it here
0:07:50.880,0:07:59.980
as you can see here perfect
0:07:54.220,0:08:02.350
here ok guys we just did it now want to
0:07:59.980,0:08:04.690
take the background to use the
0:08:02.350,0:08:08.590
background over here i will give you the
0:08:04.690,0:08:14.130
background as well I will take it thank
0:08:08.590,0:08:19.450
you and I want to use it here okay now
0:08:14.130,0:08:24.130
I'm gonna crop the image again till we
0:08:19.450,0:08:27.910
see the shadow over here we get the
0:08:24.130,0:08:30.310
illusion that is jumping okay the
0:08:27.910,0:08:35.110
background needs to be in the background
0:08:30.310,0:08:40.330
guys perfect now we're gonna make a few
0:08:35.110,0:08:45.010
changes over here as you can see i'm
0:08:40.330,0:08:46.720
going to use our brush now i want to use
0:08:45.010,0:08:49.810
the black one
0:08:46.720,0:08:52.420
okay guys we just did the dispersion of
0:08:49.810,0:08:54.569
fact don't forget to subscribe to our
0:08:52.420,0:08:58.120
channel leave your comments below and
0:08:54.569,0:09:03.389
thumbs up to this video and share it
0:08:58.120,0:09:03.389
with your friends until next time bye
Screenshots
Profiles
Profile 1
| Purpose | Tutorial |
|---|---|
| Content | Portrait, Scene |
| Participants | nameless (m) model, Photoshop (m) geek, Celebrity (m), Celebrity (f) |
| Form | Tutorial (how), screen grab |
| Time | |
| Place |


