How to Create a Double Exposure in Adobe Photoshop
Figuration: Tutorial
Description
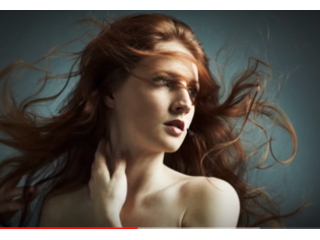
Learn how to create a double exposure effect in Photoshop, using two images, selection methods, layer masks, Adjustment Layers, and more!
Learn all your want with 10 days FREE at Lynda.com: http://www.lynda.com/howard
Support my content: http://www.patreon.com/howardpinsky
Tools used in this tutorial:
Quick Selection Tool: This selection method works very similar to a brush, allowing you to brush over the areas you wish to turn into a selection. By default, every stroke adds to your selection. If you wish to deselect some areas, hold down your Alt (Windows) or Option (Mac) key and brush.
Refine Edge: When you initially create a selection, it's likely to be very sharp around the edges, and likely won't contain hair or fur. Refine Edge will allow you to not only soften out those edges, but you'll be able to use Smart Radius to grab hair and fur which may not have been selected.
Color Range: If you're looking to select all or most of a single color in your image, Color Range will help you do that. It lets you automatically target pure colors, or sample specific colors using the eye dropper. To add to your sample, hold down shift. To subtract, hold down Alt (Windows) or Option (Mac). Pressing OK will create the selection.
Layer Masks: If there's an area of your layer that you wish to hide (or bring back), Layer Masks will help you do that. Painting using a black brush will hide portions of the layer, and painting with a white brush will reveal them.
Adjustment Layers: By using an Adjustment Layers, you're able to change targeted areas of your photo without damaging the original layer. These can either be applied to the full image, or specific areas using selections or Layer Masks. At any point in the future, you can either make changes to the adjustment, hide it, or delete it completely.
Make sure to check out my other Photoshop tutorials. Links below!
MORE FROM ICEFLOWSTUDIOS:
Subscribe!
https://www.youtube.com/subscription_center?add_user=iceflowstudios
Website!
http://www.iceflowstudios.com
Facebook!
http://www.facebook.com/iceflowstudios
Twitter!
http://www.twitter.com/pinsky
Google+!
http://gplus.to/pinsky
IceflowStudios is run by Howard Pinsky, providing FREE Adobe Photoshop and Adobe Photoshop Lightroom video tutorials to the graphic design and photographer community. As an Adobe Community Professional, Howard's Photoshop tutorials have been recognized by schools around the country, design blogs, and by Adobe. To date, the videos uploaded to the IceflowStudios YouTube channel and website have been viewed over 80 million times.
No matter what you're looking to learn in Photoshop, you're bound to find it in our library of over 350 tutorials. Topics include: Text Effects in Photoshop, Photo Composition, Photo Retouching, The Basics of Photoshop, Designing in Photoshop, Special Effects, and more! While new videos will be taught using the latest version of Photoshop, you'll find videos covering Photoshop CC, Photoshop CS6, CS5, CS4, and CS3.
For more information on Adobe Photoshop, check out Adobe's website at: http://www.adobe.com/products/photoshop.html
For the written version of most of our tutorials, check out: http://www.iceflowstudios.com/
Metadata
| Video ID | 72 | Youtube URL | How to Create a Double Exposure in Adobe Photoshop |
|---|---|
| Captions Available | Yes |
| Captions Downloadable | No |
| Playlists | |
| Duration | 00:09:11 |
| Definition | hd |
| Keywords | |
| License | youtube |
| Embeddable | Yes |
| Views | 388641 |
| Likes | 6199 |
| Dislikes | 78 |
| Favourites | 0 |
| Comments | 359 |
| Created | 2017-05-04 1:00:42 PM |
| Updated | 2017-05-04 1:10:25 PM |
Captions
Captions for this video exist, but their contents were not available to download.
Screenshots
Filter:
Profiles
Profile 1
| Purpose | Tutorial |
|---|---|
| Content | |
| Participants | |
| Form | Tutorial (how), Mid shot |
| Time | |
| Place |
Profile 2
| Purpose | |
|---|---|
| Content | |
| Participants | nameless (f) model, Photoshop (m) geek |
| Form | |
| Time | Medium |
| Place | Desktop, set |


